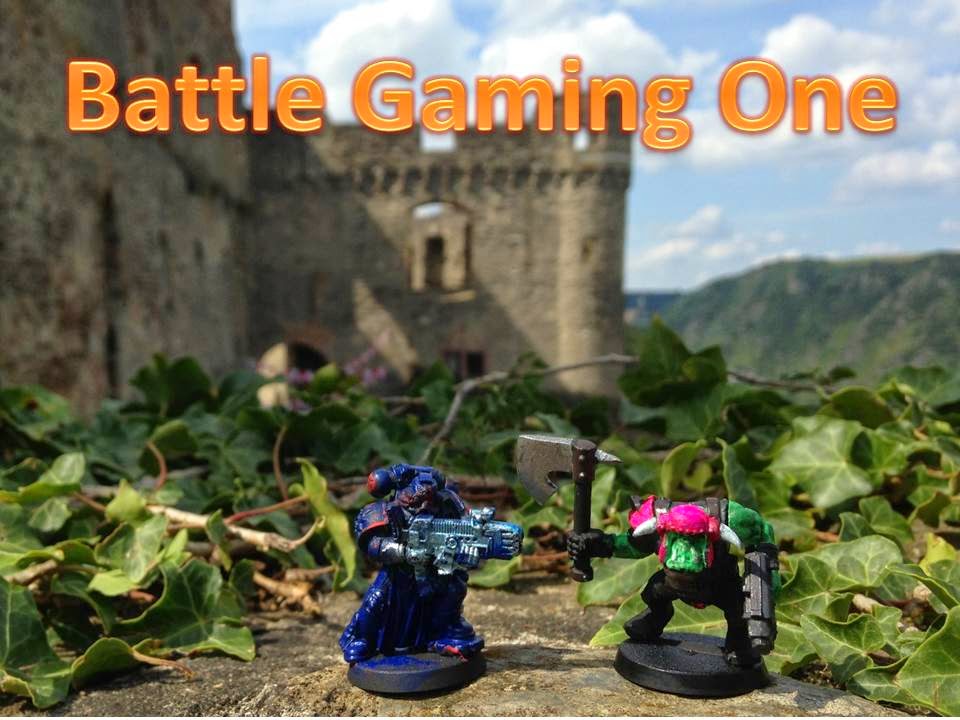
Hi everyone!
We finished the Dakka Chugga this past week! Please check out what we've been up to. Appreciate any thoughts or ideas for further work :)

The pressure was on because we wanted to take it with us to Canada to show Matt from Miniwargaming.com. So, lots of construction in the past two weeks :)
And, plenty of small things left to complete -- those will be fun!
Will put this posting in four sections: 1) photos of the Dakka Chugga as it stands today; 2) how we built it; 3) how we got it to Canada and back (safely!); 4) future plans
1. The Dakka Chugga!
We took some posed shots with our original Pink Orkys. These were our first 10 Ork Boyz with pink armor. We're working on the story line - where the Pink Orks -- stranded on a planet because of poor battle performance -- have to build the Dakka Chugga to escape.... [Here's a link to the first Chapta of that story.]

")
Here are front views of the Dakka Chugga. Clearly comes with a built-in reinforced ram. The Kow Kacha is nicely set up to help plow through enemies.


Here is a close-up of the Tenda where the side-bin of Choppas is stored - at the ready. After a battle, dead bodies of (Tyranids) can be chopped and chucked directly into the Tenda.


")


We finished the Dakka Chugga this past week! Please check out what we've been up to. Appreciate any thoughts or ideas for further work :)
Da Pink Orkys Dakka Chugga!
The pressure was on because we wanted to take it with us to Canada to show Matt from Miniwargaming.com. So, lots of construction in the past two weeks :)
And, plenty of small things left to complete -- those will be fun!
Will put this posting in four sections: 1) photos of the Dakka Chugga as it stands today; 2) how we built it; 3) how we got it to Canada and back (safely!); 4) future plans
1. The Dakka Chugga!
We took some posed shots with our original Pink Orkys. These were our first 10 Ork Boyz with pink armor. We're working on the story line - where the Pink Orks -- stranded on a planet because of poor battle performance -- have to build the Dakka Chugga to escape.... [Here's a link to the first Chapta of that story.]
A view of the port side of the Dakka Chugga
A quick explanation of a few of the port-side features:
- Workin Turrit (Both elevation and rotation functions working)
- Fuel (Fool) Choppas The Dakka Chugga is fueled by whoever is fool enough to get in its way. (In this case Tyranids.)
- Trakshun Goo Holda The Pink Orks' Mek has had his grots scoop up Tyranid icor and has loaded this into a dispenser. Because of this, the Dakka Chugga can plow forward without rails. When it comes to the Don't Touch Dat! rule, this is one of the controls to watch out for!!
- Lookin Pipe With the load-out of gear, it's difficult for the Dakka Chugga's Driva (engineer) to see. So, he can zero in on his targets using this periscope.
- Buzz Saw Ground troops should stay away from the port side, else they'll be buzzed up (and prepped for the fuel process).
- Rokkit Lanchas The Dakka Chugga is designed to throw a serious punch. We plan to run it with the maximum number of rokkit lanchas under the looted wagon rules.
View of the port side with "Feecha List" of the Dakka Chugga
Here are front views of the Dakka Chugga. Clearly comes with a built-in reinforced ram. The Kow Kacha is nicely set up to help plow through enemies.
Dakka Chugga from the front!
The Dakka Chugga heading straight toward the camera. Turrit tracking in on target....
Here is a close-up of the Tenda where the side-bin of Choppas is stored - at the ready. After a battle, dead bodies of (Tyranids) can be chopped and chucked directly into the Tenda.
View of the Tenda, loaded up with Tyranid bodies, side-bin of Choppa for Fool Choppin
Here is a quick list of the starboard side features
- Boyz in the Tenda Set-up with some big weapons to ensure there is nobody coming up behind the Dakka Chugga.
- Fuel (Fool) Loada As you might guess, the Loada is chuckin fuel (Tyranid bodies) into the Boila of the Chugga.
- Force Field Stuff The Mek hasn't gotten all of this working yet - but the Dakka Chugga does have KFF hardware installed....
- Driva The Dakka Chugga's Driva is peering out the starboard side - figurin' how to go fasta and fire more dakka!
- Extra Smoka The smoke stack of the Dakka Chugga has Mek-enchanced bitz to cause the Boila to belch out extra smoke (for kamoflajin!!)
- Combi-Big Shoota-Burna and More Big Shootas Lots of shooty and burny weapons on the starboard side.
View of the starboard side of the Dakka Chugga and "Feecha List"
Here are closer views of the Chugga and the Tenda so that you can see the Loada and the Driva better....
Close-in view of the Driva. Behind him, you can see the Loada Chukkin Fuel....
We took photos with the Chugga decoupled from the Tenda. Here's a look at the cabin of the Chugga. We added a skull throttle and other Mek-modified controls. The Pink Orks also had to enlarge the opening of the Boila's Burna-Box to fit Tyranid bodies inside with only some shoving!
A view of the Chugga's cabin - Driva leanin' out the winda' in classic fashion (we couldn't help ourselves with this bit of nostalgia)
Here's a look at the front of the Tenda so that you can have a better view of the Tyranid bodies loaded up :)
Chopped up Tyranids filled up the Tenda....
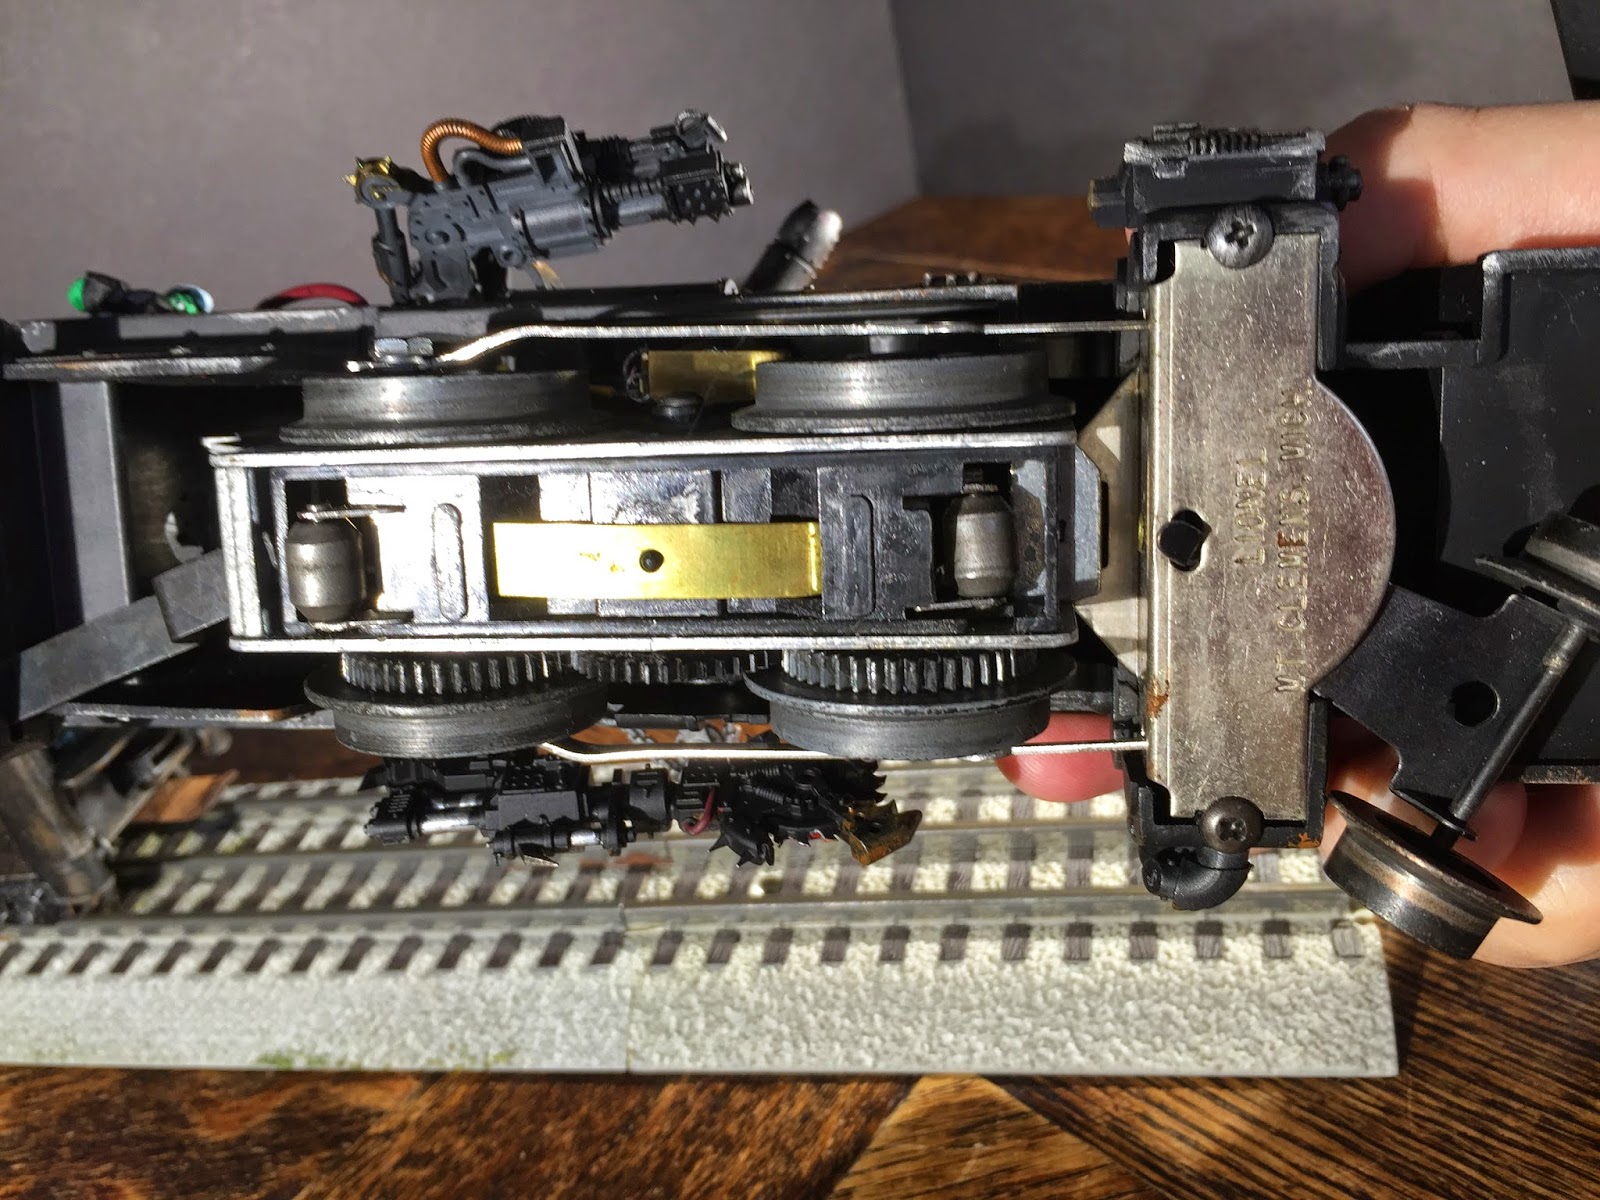
Does it run?? Well, we'll only be able to prove that with a video - but as you can see, we maintained the operating motor and pickups - so no issues with running the Dakka Chugga around *fill in the blank* [Christmas tree??]
Bottom view of the Chugga - electric motor and pick-ups still in place :)
2. Building the Dakka Chugga!
We built the Dakka Chugga from a classic Lionel steam engine. In this case, a 2-4-0 rig.
We had several to select from (had purchased a bunch of old parts off of eBay - plus had been collecting here and there). But, we wanted to pick an 'engine' where we had 2 almost identical shells. The reason for this was that we wanted to make a rusted up version (which the Pink Orks could find) -- and then the Mekked-up Dakka Chugga's 'engine'.
For the Tenda portion - the ones with the sloped back looked nice -- but we didn't select these because we had the idea of fitting Tyranid bodies in there from day #1 -- and we didn't think we could fit as many....
Dakka Chugga engine and tender candidates. The one we selected in the near-right (#8602). We used the tender in the fore-ground-left as well. In the rear-right you can see the "shell" we used to make the rusty version....
Here is the rusty engine we created side-by-side with the finished Dakka Chugga.
Our rusty Chugga next to the finished one :)
We started work on the Tenda. Step one was to cut out the coal. Note: That old-school plastic in Lionel models is extremely hard. It's almost like a bakelite material. Makes a real mess. We used a demel tool to do most of this work.
The Dakka Chugga's Tenda after cutting the coal out of the old Lionel tender
The next step was to create a box into which we could glue the Tyranid bodies. The class Lionel tender is a flat metal piece with two trucks attached. The tender body attached on top of that. We didn't want to glue to that metal piece. So, we took the metal base off and worked on the plastic top.
We used plastic sheet to form the base - used pretty thick material. We added some straight sprue pieces underneath to act as beams. We needed quite a bit of gluing surface area to get this to hold together with that bakelite type plastic.
The Dakka Chugga's Tenda after adding the floor (to hold the Tyranid bodies)
Then we started adding plastic bits to the outside to make a patched look. We put some into boiling water to warp them to the contour of the Tenda. Some Trukk armor bits in the back.
Adding bits toh the sides of the Tenda (various patches and symbols)
When we were done adding bits to the outside it still looked pretty plain. So, we started gluing various spikey weapons to the outside. That still looked sort of weird. And, then it hit us that this could be the bin to hold the extra choppy weapons to chopping up the Tyranid fuel. This gave us the idea we needed to form it up as a bit of a box. The white pieces of plastic were from a bread bag (those plastic pieces which hold the bag closed).... You'll also see some Ork flyer pieces on here....
Our Fuel Choppa Holda on the side of the Tenda
We had gotten our hands on some broken up Tyranids on eBay. We pieced these back together and air brushed them to that the tops would be blue, bottoms black. Then added accent colors. We figured that these were probably not the greatest colors for Tyranids - but they looked nice side-by-side with our Pink Orks.
These are the ill-fated Tyranids. We first fixed them (got them on eBay all broken), then pained them, then staged photos for Chapta 2 of our story. Then, as you'll see, we hit them with Choppas!
To make sure the Tenda looked *totally* full of Tyranid bodies and guts we cut-to-fit pieces of these egg-sack-like bits we had purchased off of eBay. (Not sure if these were actually original Tyranid pieces or something else. Regardless, when we painted them up to match the Tyranids, they worked out pretty we underneath them.)
Don't know what these were called - but they looked cool under the Tyranid bodies
We primed the Tenda with all of the Fuel Choppas and other pieces - so that these would be primed black. Then, with the Tenda loaded with the larva bits (which we had painted separately), here's now things were looking....
Dakka Chugga's Tenda all primed. Laying in base of larva pieces.
We test fit our Loada ork to make sure he was going to work well. We had set one Tyranid body aside as the one he would throw. Also very nice that the Ork Boyz kits have both left and right hands which are already in a 'holding' position (for holding big shootas). So, we built an ork with both hands this way....
We ended up putting the Loada Boy up on top of the pile of bodies a bit more. Helped to make him stand out and also seemed more realistic.
Dry run with the Ork Loada
We mixed the GW's gooey green Nurgles Rot paint with Grumbacher Gel 531 to make a thicker mix and then dabbed it all over the Tyranid bodies. Then we glued those in place.
Tenda full of Tyranid bodies. Still needing more Tyranid icor!
Turned out that we needed quite a few batches of the Nurgles + Gel to make things look slimy enough. Here's how things looked before the Gel was dry (it starts as opaque white, but dries clear).....
Another patch of Tyranid icor - waiting for it to dry :)
Then, it was time to work on the Chugga!
Step one for us was to remove the motor from the inside. This really helped because then we were just working on the plastic shell.
A really nice person on Dakka Dakka had sold us a whole bunch of bits (many from Trukk, Battlewagon and Stompa) so we had lots of great raw material to work from. A big problem, though was finding a way to place a turret onto the Chugga.
We ended up building out of a the turret section of a WWII Panzer tank. This gave us the pieces we needed for both rotation and elevation. We had some great gun barrel type pieces - but we had gotten excited about using those as Mek Guns - so we fashioned our gun barrel out of a burna bommer's ordnance. Placing the driver from an Ork vehicle into the turret worked pretty well :)
We built up a lower section of the turret with various pieces of plastic. And, to make sure this stayed on well. we used exoxy. Super glue connections to the Lionel plastic weren't working very well for us. And, we had a hard time getting model glue to work. So, we went with the heavy-duty epoxy. This worked just fine - and left a bead which looks very much like an Ork Mek weld.
Working on the Dakka Chugga's Turrit
We had agreed that to keep the Lionel heritage we would keep the 8602 number on one side -- and cut open the window on the other side -- for the Ork Driva to be leaning out. Here's the side where we chopped things open. We added some rear steel to close the window in. (This bit may remind you of the reinforced ram pieces from a Trukk!!)
Modified Cab of the Dakka Chugga
We wanted to have missile launchers - but couldn't find any good ones in our bits pile. So, we used some of the shoota weapons from the Ork planes -- cutting off the gun barrel -- and then glued in the tips of missiles.
Piecing together a Rokkit Lancha out of missile and gun parts
Here's how things looked after about 50% of the work. We still hadn't mounted the weapon "arms" on either side.
To put the goo dispenser on - we actually cut the sand-dome off of the top and glued one of the spherical tanks we had left over from our Mek Gun build right into the hole which was left.
The big teeth and horned piece on the front game from some (of what we think were) GW Fantasy bits we had picked up on eBay. It took some cutting to get that to fit over the headlight of the Chugga. But, we did get it done finally.
Half way done with the shell!
To create the Driva we tried to make an Ork who looked a lot like the stereotypical train engineer. Couldn't find a very good engineer's hat though. So, this is actually a hat from the Panzer officer -- cut off carefully -- and then reamed out to make hollow -- and glued onto the Orks head. The arms of the Ork are from the Ork Trakk -- modified a bit to make it look like he's wearing work gloves.
It was tricky to get the Ork put together so that he could look out the window. Did quite a bit of trial and effor on his limb placement to get this to work. Here are the pieces as we got him put together....
Working on the Ork Driva. Fitting the hat onto the Driva's head
And, here's the shell -- nearly completed. Still a few touches to add (the hoses from the slime dome), getting the Driva's head glued on. But, mostly finished.
Shell of the Chugga almost done!
We actually didn't fully assemble it until we got it to Canada. More of that in the transporting section. But, it does go together pretty easily. We had been careful to make the turret assembly hollow so that you can still screw the locomotive's shell to the electric motor assembly which fits underneath (classic Lionel design).
3. Getting the Dakka Chugga to Canada and Back!
We transported it in three pieces.
(1) Electric motor for the Chugga. This we fully bubble wrapped - and placed in its own area. It is pretty massy - iron outer section; copper windings; iron wheels. So, we figured we should keep it away from other plastic models. Also didn't want it installed in the Chugga because we didn't want it's mass to cause the outer shell to slam into things.
(2) Chugga shell. Wrapped this carefully in bubble wrap and soft material.
(3) Fully assembled Tenda. Wrapped this carefully in bubble wrap and soft material.
Results:
Tenda - no issues either way. 100% success.
Chugga - only minor issues. Electric motor pretty much impervious - and as far as we could tell we didn't suffer any fratricide either (because of the mass of the motor). We had the starboard side gun-arm come off on the trip into Canada (very easy fix); and zero issues on the trip home.
4. Improvements to the Dakka Chugga!
- Light and Sound We do intend to add lighting and sound. For lighting we are going to use the kit we got from Powered Play Gaming. White light for the headlight; red light inside the Boila's Burna. Will put the control card back in the Tenda and run wires forward. Also planning to put the sound card in the Tenda. (There is lots of room there under the Tyranid floor we created.)
- More Gutz Charred Tyranid arm sticking out of Boila's Burna Box. (After all, Orks aren't very neat in doing things....)
- More Dakka Twin linked big shoot out the port-side window. We have this ready to go - just didn't have it painted in time. This way the Driva has something to easily aim and shoot. This is also the reason we set him up with the periscope.
Next writing -- will finish the Pink Orkys story - Chaptas 2 and 3. Fighting off Tyranids; Riding the Dakka Chugga.
Next build project -- working on a Gantry for our Launchable Grot Rokkit [Link to that posting]. And, starting to scheme on a modified diesel locomotive for the Yellow Orks to use. Planning to modify a GP9 for that!
Update: Here is the Dakka Chugga in motion :)
We set up some track and put the Dakka Chugga to work (hauling Space Marines)!
(Here is a Youtube Link since that probably looks nicer.)
No comments:
Post a Comment